Building Your Own Command Line Interface (CLI) like AWS CLI: A Hands-On Guide with Airtable APIs
Introduction
Have you ever wondered how powerful command-line tools like AWS CLI or Docker CLI are created? In this blog, we will take you through the process of building your very own CLI program using Airtable APIs for demonstration purposes. By the end of this tutorial, you will understand how to set up a CLI application and package and install it, making it accessible just like the popular AWS CLI.
In this step-by-step guide, you will learn:
- How to set up a Python project using Poetry.
- Creating a CLI application with Typer, a library for building CLI applications.
- Integrating Airtable APIs to interact with your Airtable bases and tables.
- Packaging your CLI tool for installation and distribution.
This tutorial assumes you have a basic understanding of Python and some familiarity with command-line interfaces. Let’s dive in and start building a CLI tool that will simplify interactions with Airtable, showcasing the fundamentals needed to create robust CLI applications similar to AWS CLI.
Installing Poetry
To install Poetry, run the following command:
pip install poetryCreating a New Project
Create a new project using Poetry:
poetry new air-tbl-cliNavigate to the project directory:
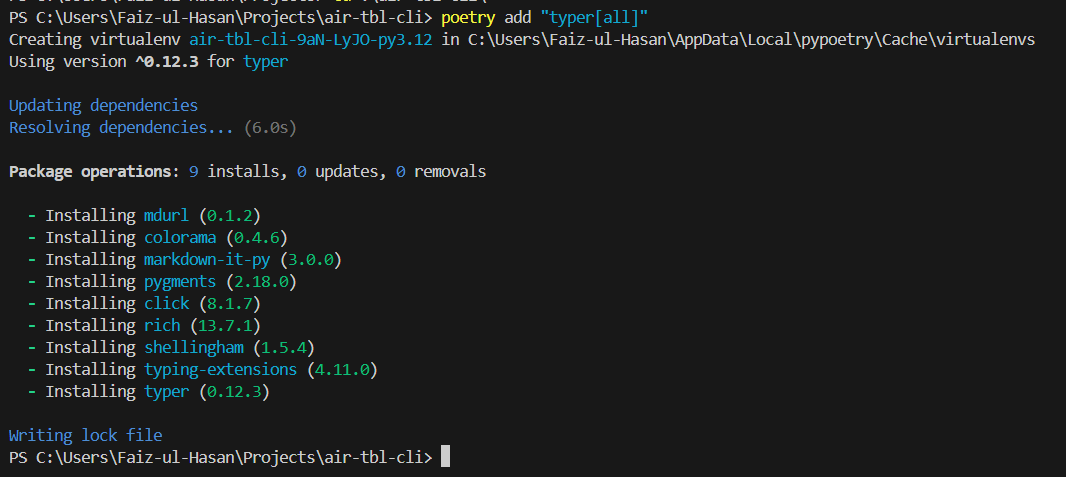
cd air-tbl-cli Add dependencies to the project:
poetry add "typer[all]"This will create a virtual environment.
Activate the newly created virtual environment:
poetry shell If you encounter the following error.
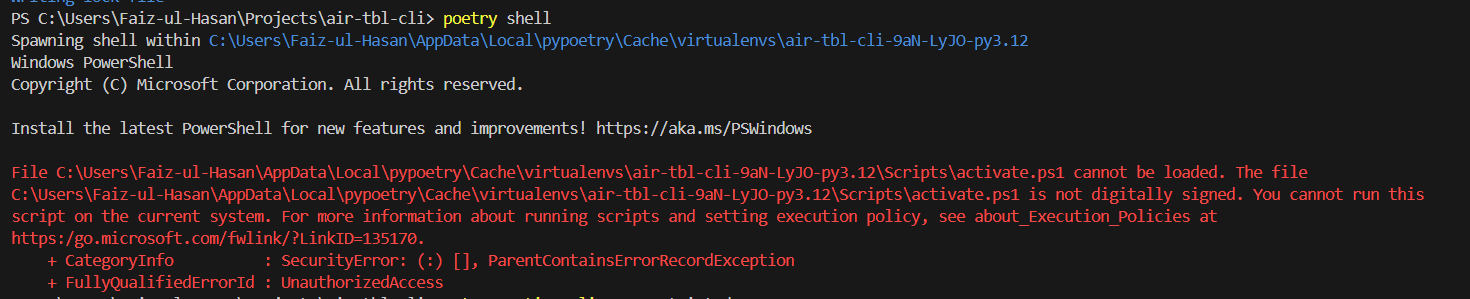
Execute the following command and activate your environment:
Set-ExecutionPolicy Unrestricted -Scope ProcessNow, your environment should be activated, and you will see the following console output.

Project Structure
You will see the following folder structure in your project folder:
├── poetry.lock
├── pyproject.toml
├── README.md
├── air_tbl_cli
│ └── __init__.py
└── tests
└── __init__.py
Creating the CLI App with Typer
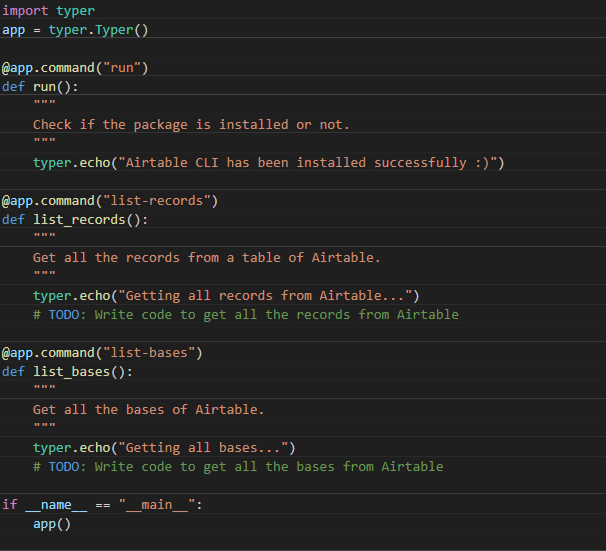
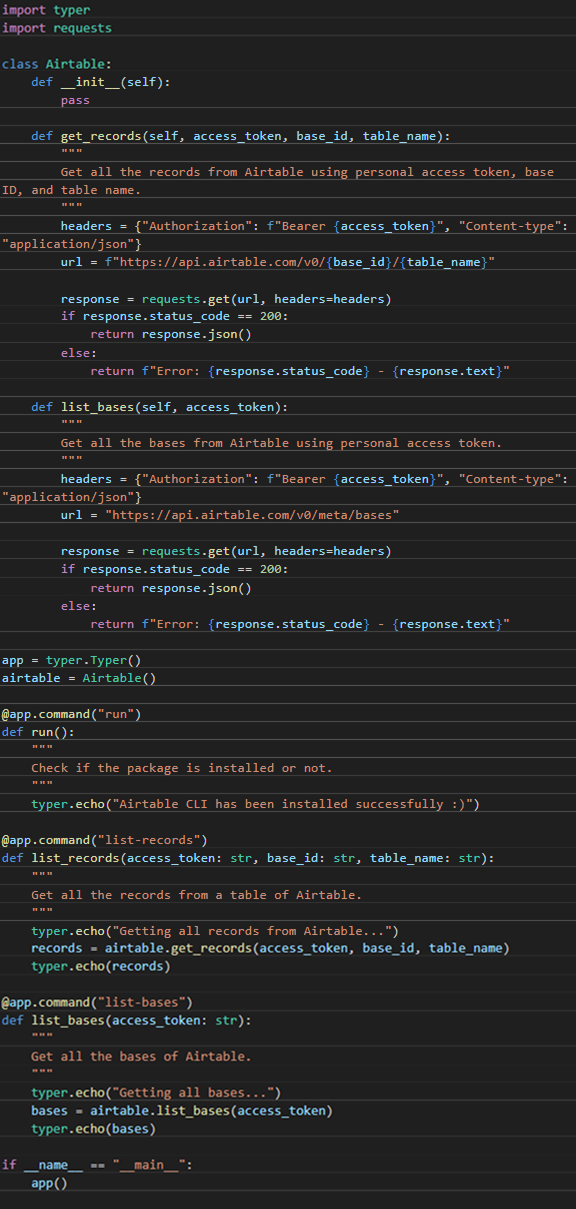
First, create an air_tbl_cli/main.py file with the following code:
Code Explanation
- import typer: Imports the Typer library.
- app = typer.Typer(): Initializes a Typer app.
- @app.command("run"): Decorator that registers the function as a command named "run".
- run(): Function that prints a message to check if the package is installed.
- @app.command("list-records"): Decorator that registers the function as a command named "list-records".
- list_records(): Function that prints a message to indicate fetching records from Airtable.
- @app.command("list-bases"): Decorator that registers the function as a command named "list-bases".
- list_bases(): Function that prints a message to indicate fetching bases from Airtable.
Running the CLI
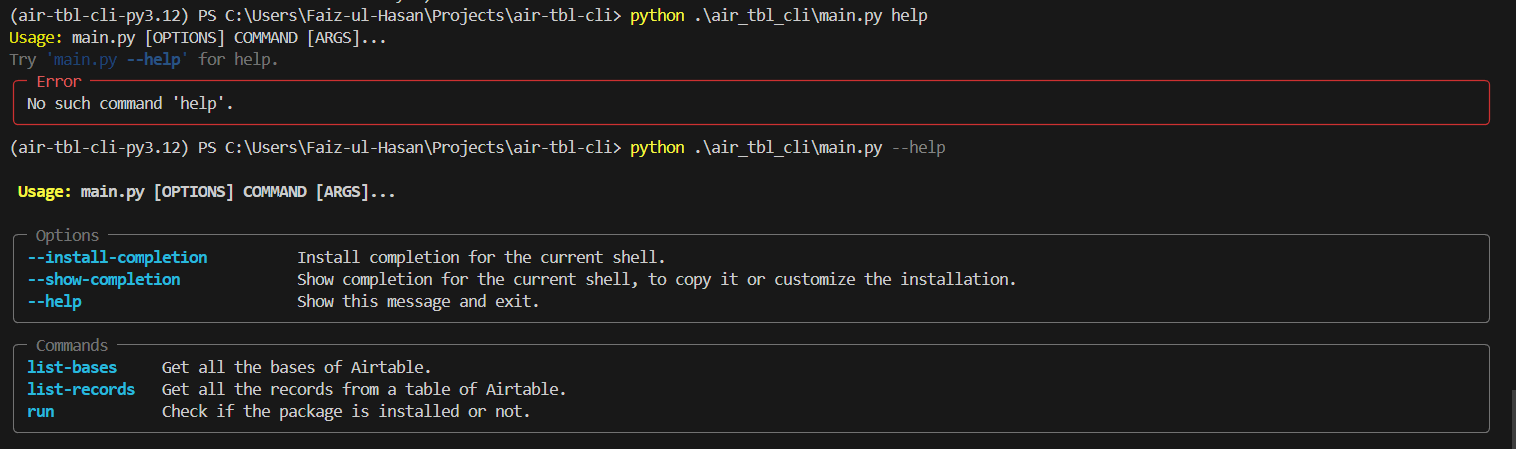
To see the available commands, run:python .\air_tbl_cli\main.py –help After running this you will get the following commands.
To execute the run command, run:
python .\air_tbl_cli\main.py runYou should see the message:

Using Airtable APIs
Next, we'll write code to interact with Airtable APIs. Create a class Airtable with the following code:

Code Explanation
- import requests: Imports the Requests library for making HTTP requests.
- class Airtable: Defines the Airtable class.
- def __init__(self): Initializes the Airtable class.
- def get_records(self, access_token, base_id, table_name): to fetch records from Airtable.
- headers: Sets the authorization and content-type headers.
- url: Constructs the API URL.
- response = requests.get(url, headers=headers): Makes the GET request.
- return response.json(): Returns the JSON response if the status code is 200, otherwise returns an error message.
- def list_bases(self, access_token): Function to fetch bases from Airtable.
- Similar structure to get_records.
Integrating with main.py
Install the Requests library: poetry add requests Update main.py with the following code:
Code Explanation
- Added airtable = Airtable() to create an instance of the Airtable class.
- Updated list_records and list_bases commands to use methods from the Airtable class.
- Included necessary imports and annotations for command parameters.
Testing the CLI
To list all bases:python .\air_tbl_cli\main.py list-bases python .\air_tbl_cli\main.py list-records
Installing the CLI
To install the CLI, add a configuration to the pyproject.toml file in the [tool.poetry.scripts] section:
[tool.poetry.scripts]

                            air-tbl-cli = "air_tbl_cli.main:app"
Configuration Explanation
- air-tbl-cli is the name of the command-line program that you can run from the terminal.
- air_tbl_cli.main means we're referring to a Python
module that we can import, similar to how we do it in
Python, for example:
from air_tbl_cli.main import something - The app in air_tbl_cli.main:app is what we want to
import from the module and then call as a function. For
example:
from air_tbl_cli.main import app app()
This configuration tells Poetry that when we install this package, it should set up a command-line program called air tbl-cli."
Install the package:
poetry install This will install the air-tbl-cli program in your created environment.

Check the installation:
air-tbl-cli --help Run the CLI to verify:
air-tbl-cli runCreating a Wheel Package
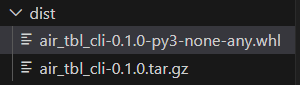
Python packages follow a standard format called a 'wheel', which is a file with a .whl extension. You can create a wheel using Poetry by running the command poetry build. After running this command, you will see the following output in the console.

If you check your project directory, you'll see two files. The one with the .whl extension is your wheel file.
To install the wheel package:
pip install Example:
pip install C:\Users\Faiz-ul-Hasan\Projects\air-tbl-cli\dist\air_tbl_cli
0.1.0-py3-none-any.whl
After this command, you will see that air-tbl-cli package has been installed.
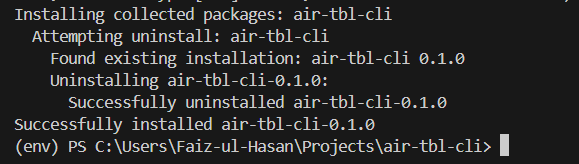
To uninstall the package:
pip uninstall air-tbl-cliConclusion
In this blog, we have walked through the steps to build a simple yet powerful command-line interface (CLI) using Poetry and Typer. We started by setting up a Python project with Poetry, then created a CLI app that interacts with Airtable APIs. You learned how to fetch records and list bases from Airtable, and how to package your CLI tool for easy installation.
By following this guide, you now have the foundation to build and customize your own CLI tools, similar to the popular AWS CLI and Docker CLI. This CLI project is just a starting point, and you can expand it by adding more commands and functionalities as needed. The skills you’ve learned here will help you create useful tools for automating tasks and enhancing your workflow.
Thank you for following along, and happy coding!


Comments